Mother hen

Tuesday, September 1, 2015

Pros and cons of free ranging chickens


Well we all know the main reason to keep chickens is their eggs and meat if you're raising meat birds but there are many other pros and cons to raising them and letting them free range and I will go over them today.


Pros:
-The eggs taste so much better and the yolks are bright orange. 
-They eat all the bugs around your house 
-They'll till your garden beds for you 
- Happy chickens. They absolutely love being out eating bugs and grass and stuff. 
-They fertilize your yard our lawn has never looked so good (minus the poop blobs.)


Cons:
- they till your gardens. Not good when you've just planted them
- they shit everywhere even on your front porch so every pair of shoes you own is covered in chicken shit
- they are more prone to become prey. We've been pretty lucky and only lost one bird so far which is pretty surprising considering where we live. 
- they eat just about anything including your plants and veggies.
- they don't always lay their eggs in their nesting boxes and you'll find them around the yard. 


It may seem like the cons far out way the pros but I think I've found a balance. We let the girls out to free range in the evening after they've laid their eggs to minimize egg loss and the girls are happy because they still get to go out. We have a run around the coop so it's not liked they're really cooped up all day anyway. 


The chicken shit everywhere problem, I have yet to solve, but at least they haven't been pooping on the deck and porches in a while so our shoes have been a little cleaner. 


Well that concludes my list of the pros and cons of free ranging chickens. May this help you figure out how you plan to keep your back yard flock. 

~Megan~

Wednesday, August 19, 2015

Tips for Shopping your Local Farmers Market


This the season for farmers markets!! All the glorious local bounty all in one place for you to bring home for you and yours. What could be so hard about shopping your local farmers market that you'd need tips, you might ask, well it's not brain science but having a strategy and knowing what to look for and having a system can really help you make the best of what the season has to give and knowing what and who you're supporting in the process.


Know what's in season when you go and try and shop around it. People in our society these days are so accustomed to getting anything any any time of the year that they forget that things only grow in certain seasons. That's because they are shipped in from all around the globe. So if you want to shop in season don't  expect tomatoes in the spring, (unless they're grown in a greenhouse) and don't expect blueberries in the end of August. If you see items that are not fitting into what is in season at the time it's often an indicator that the vendor is getting their stuff from somewhere else. You can often go to your states CISA page to find out not only when and where local farmers markets are but also what they'll have to offer that week too. 


Scope out the situation. Do a walk through before you buy. See what looks good from who and what practices they use or if they even grow it themselves. Surprisingly a lot of vendors will get stuff to sell in bulk from various different farms. To me the whole point of a market is getting my stuff as local and organic as possible and I'd like to meet the people growing it to see if their growing practices meet my standards. Lastly check prices to see what is the best price for the best looking stuff. 


Once you've done a walk through and figured out what looks best, is cost effective and fits your standards of production. Go ahead and buy. I try to purchase something from everyone that fits the organic and sustainable and local guidelines. 


Also don't think that farmers markets only sell produce. Nowadays farmers markets often have local craft vendors, wineries and local handmade body products and things too, so you can go there to get gifts and treats of all kinds.


Well I hope this helped to broaden your scope of farmers markets and gave you some helpful tips on how to shop your local farmers market. Enjoy the wonderful beauty and bounty that the season has to offer!! 

~Megan~

Saturday, July 18, 2015

15 Things That Helped Me Survive the First 3 Months of My Colicky Baby

Having a colicky baby can really be hard on you especially in those first few months when you're already completely sleep deprived and have the baby blues. It feels like they are never going to stop screaming and crying and you'll never get sleep again but there is a light at the end of the tunnel, and I found a few things that really helped my little girls colic. They say most cases of colic go away around the 3 month marker and for the most part  that was somewhat accurate for her too. They link colic to digestive issues and and immature digestive track that leads to gas and bloating causing them to cry for hours on end and usually at bed time. My little girl would cry and cry and scream from around 7pm until 4am every night. I thought I was going to loose it and go completely insane because I couldn't sleep during the day while she was sleeping so I would literally get 4 hours of broken sleep tops, not good. So I went on the search for every known cure out there to help me get through this awful stage and here are the things that helped me survive the 3 plus months of my colicky baby girl. 


1. Walking around while bouncing the baby.  Something about all of the motion in the closeness of mommy or daddy's arms really helps to calm a screaming baby.  Although it may make them stop crying one night and not the next. I It seemed to help calm my little girl somewhat and it was our nightly routine to get her to fall asleep and ease the nonstop crying. I think I must have walked miles every night around the house to get my little one to sleep. 

2. Swinging. Sometimes the swing was all it took to help calm the crying and put her to sleep, at least for a little while, and gave very tired arms and whole body a rest. Same theory as the walking and bouncing. The motion seems to lull them into a more peaceful state. Same goes for the rocking chair.


3. Moby wrapThis right here was the biggest life saver. Most of the time our little girl just needed to be held and it's tiring! A 7 lb baby doesn't seem all that heavy until you have to carry her around 24/7. This literally saved me from completely loosing it and committing myself to an insane asylum. I was using a backpack style baby carrier but it was very bulky and just not that comfortable for me or her when multiple moms suggested the Moby wrap. It seems like a very complex system to wrap the very long scarf like piece of fabric but after you do it a couple times it's super easy.  It's not bulky and the baby fits snugly in it right next to mama where they miss being after living inside you for almost 10 months. With your hands free you can actually do things and your arms don't feel like they are going to fall off and baby feels nice and secure next to mommy. They say the act of baby wearing from birth on helps make the transition easier for the baby and cuts crying and I can attest to that I just wish I started earlier maybe things would have gotten better sooner. Also reflux and gas are big culprits of colic too and keeping baby upright after meals in the wrap helps the reflux and the pressure on their belly helps to pass the gas. So do yourself a favor and get a Moby wrap or one like a Moby wrap you will be forever grateful, trust me. 


 4. Gripe water and gas drops.  Being someone that really doesn't want to give my baby things that aren't natural and organic I leaned more on the side of gripe water which has things like fennel and ginger in it to ease stomach discomfort and gas, which does help somewhat, but if it's real bad it doesn't quite cut the mustard. The second line of defense was the Hyland's homeopathic gas drops that uses herbs to do the same thing but when it was really bad it didn't really cut it either. So the third and final line of defense was the regular old gas drops, I used these. I leaned to the dye free, gluten free version and they would usually help cut the gas pretty well.

5. Bath time during colic hours. Baths are just generally very relaxing for everyone and especially babies. The warm water resembles the womb and has a very calming effect and for the 5 or 10 minutes they are in there for you can get a break from the crying. It's a great idea to add this to your nightly routine, routine also helps baby to realize bed time from any other time of day. 

6. Dimming or shutting off lights at night. Baby's don't have internal clocks when they are born and they don't know day from night. This is helpful to get them to realize bedtime from awake time.  Artificial lighting can trick them into thinking that it's time to be awake. Plus it can also be stimulating to them after a whole life of darkness in the womb. I put night lights in the nursery and my bedroom so that I could still see to nurse or change her diaper but the light was not keeping her awake. 

7. Aroma therapy. Using essential oils like lavender and other calming herbs like camomile in the air and on you and your baby can work to help instil calm and also act as a marker for bed time. I would try to only use calming lotion and lavender oil on the wood stove at night so that she would associate the smell with bed time along with natural calming effect that it has anyway. 

8. Baby massage. Just giving your baby a little rub down really helps to calm them and is a nice addition to the night time bath for babies. I mean who doesn't like a nice massage. One massage technique that really helped with the gas was the I love you baby massage, find out how to do it here, and also just rubbing their tummy in a clock wise motion also helps to keep things passing along. 

9. The bicycle. Moving the baby's legs as if the are riding a bike helps to release gas that becomes trapped in their tummies. Babies don't have developed abdominal muscles and need help to bear down and pass things. Don't be surprised to hear some toots and for the baby to spit up especially if you just fed them. 

10. Putting legs over baby's head like you would during a diaper change. If the bicycle doesn't work try this. Lift the Baby's legs up over their head and gradually bring them down. Repeat a few times until you hear them fart a few times. This seems to be more effective than the bicycle for stubborn gas. 

11. Warm water bottle or rice pack on baby's tummy. Warm not hot packs on the baby's tummy helps by putting pressure and warmth to help ease things out. You will most likely hear some gas being passed after a few minutes of application. This was the only thing that helped on one very trying night so it's definitely worth a try. 

12. Change of scenery. Sometimes just a change of scenery is all they need to help them forget about what ails them for a while. Going for a walk outside or even putting them on their changing table can help change their minds temporarily. For us walks outside a night were off limits it being the dead of winter so the changing table was really our sanctuary. You could get at least 5-10 minutes of quiet out of it, just enough time to get your barrings back. 
photo from: http://babymassageteachertraining.com/blogs/colic-2/
13. The colic cradle hold. Holding the baby in this position helps by putting pressure on the baby's belly. This really helps but wouldn't last too long for our girl. I'd be lucky to have 15 minutes tops cry free but it would help to pass some gas. 

14. Putting baby belly side down on your lap. This really only helped us once temporarily but helping pass gas. Our little girl wasn't a fan of this position or tummy time really but worth a shot and anything to pass gas even if it causes them to cry more temporarily can help in the long run. 

15. Chiropractic care.  Birth is a traumatic experience for both mother and baby.  Miss alignments in the babies spine can cause colic symptoms in babies and chiropractic care can help to correct these miss alignments.  My little girl had some issues with her neck, called torticollis, where she would favor one side and she had reflux and chiropractic care corrected the torticollis and helped with the reflux.  It is worth a try to see if this could help, it did for us.

Finding a root cause of gas and colic symptoms is also sometimes possible. Some babies are allergic or sensitive to the food the mother is eating or the formula it is being fed.  This can often times be the cause of colic but for us it was actually an over supply and imbalance of breast milk.   Because I had so much milk she was filling up on the sugary fore milk and not getting enough fatty hind milk causing her to produce more gas. Also the forceful let down caused her to swallow a lot of air while feeding. I had to research ways to reduce my supply and I found that nursing on one breast for multiple feeding in a row before switching to the other over a few weeks time greatly reduced my supply and corrected the imbalance and it had really improved my little girls tummy issues.

These are the things that helped me out with our colicky little girl and I hope these 15 things can help to save anyone reading this many sleepless nights and worry.  Best wishes with your little ones.


~Megan~

Monday, June 29, 2015

Lessons Learned This Spring

Many things were learned this spring on the homestead. Like free range chickens and gardens don't mix, and having an infant really puts a damper on production and the 25 projects that you thought you could get done are probably not going to get done till she's in high school.

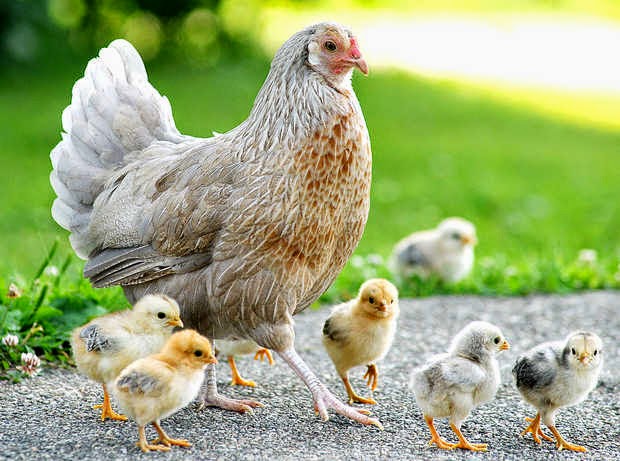
First off let me just say, I love having the ladies roam free, they're happy eating bugs and I'm happy cause there's less bugs. But if you spend lots of time and money on flower and veggie gardens, then you will not be happy when your plants get torn up while said chicken is looking for said bug and you will not be thrilled that all the mulch you put down around the plants is spread all over the lawn.  

That being said, if you want to keep your sanity and your hens alive and safe from you and predators then keep them in a run or get a chicken tractor and do yourself a favor and clip their wings so the don't hop the fence or cover the top of their enclosure too. 

This a a lesson I learned too late. Wanda the wondering Silver Laced Wondatte wondered away, hopefully not out foxed by Foxy Loxy, or fallen prey to some other predictor. Maybe by some miracle she'll wonder back home. Although I've almost made her into chicken soup several times for hopping the fence and tearing up my garden, I still wouldn't want her to be fox food. Here's to hoping you'll return, you've always been my favorite ever since you were a chick.  

Starting plants from seed indoors under lights just isn't the same as starting them in a greenhouse, another lesson learned. I'm not wasting my time and energy on the majority of seeds until I get a green house cause it's just not worth it. Most plants got leggy and just didn't preserver the way they would in a greenhouse. Plus I hate the way the seedlings end up taking over the house and it all ends up everywhere. 

Some things did good like the lettuce that survived the little greenhouse stand toppling over, another lesson learned, and the squash plants but other things like peppers and eggplants just did crappy. Nothing beats genuine, all natural sunlight and that's that and the greenhouse stand doesn't quite cut the mustard. So until I get a greenhouse plant production is only specified to a few things and that is that. 

Tasks that seem like they'd be easy to get done generally aren't, especially when you have an infant at home that won't take a bottle and wants constant attention. Gardening only gets done while baby is sleeping or for the little while toys are entertaining or when daddy is holding the little stinker. Oh we're going into July and the gardens still aren't done being mulched and the rows that seeds were planted in that never germinated and are still laying empy because you can't seem to get back out there cause your teething monster of a child won't stop screaming?  Oh yeah that's just all part of it. 

Expanding the garden and starting a small homestead business with a new baby is tougher than you think it will be before you actually have a baby, lesson learned. Babies are a lot of work, especially this little punk-in of mine. 

Projects like setting up a farm stand also prove to be one of those things that in my mind I think of as being nothing, a piece of cake right? All you've got to do is set up a little stand and put your produce and stuff in it with a cash box and you're all set right? Wrong. 

Apparently you need a permit and before you can get a permit you've got to get approved by the building inspector and see if you're properly zoned for it. And to make it that much easier for you the building inspector is only in one day a week and so isn't the town clerk and it's not the same day either. And to think I just thought I could put my veggies out front like it was nothing. Still dealing with this little farm stand lesson, what a bureaucratic nightmare. 

Thinking that you will be able to attend multiple farmers markets with a baby is also another thing that is just not going to happen unless you've got an easy baby that can be without mommy and her boobies for hours multiple times a week and daycare. I can only seem to get daddy daycare one day a week and even that's a challenge. Maybe next year when she's older I'll be able to do more. Also not all markets are created equally some you just do better at than others and some cost more to do than others and trying different ones out to see how you do really is the best thing to do when deciding on which you will attend regularly.  Also regularity is key to success at markets as well people like to know you'll be there and will be more likely to frequent your booth when you're there every week.

Another good lesson is to take help when offered. I'm always trying to be so independent, not wanting to put anyone out or have to rely on someone but you know help is great and when it's offered just take it! You don't need to be super woman and you've got nothing to prove,  so when the kid at Chipotle asks if he can help you carry your food over to your table take it, instead of saying no I've got it while juggling your wallet, keys, change, baby in her car seat, and your tacos and drink cup, to then turn around and dump the damn tacos all over your poor child in her car seat. It's much easier to take the help then to then go get the diaper bag out of the car and change and clean taco out of said seat and off baby on the bathroom floor of Chipotle because they don't even have changing tables, thank god for the changing mat in the diaper bag, and then go and get more tacos.  So yeah take the freaking help when it's offered please and save yourself the headache. 

This just about sums up the big lessons learned over here at Mother Hen's Homestead this spring.  Hopefully reading some of my mishaps will keep you from having to learn these same lessons on your own.

Best.

~Megan~


Friday, June 12, 2015

How to Take Care of Air Plants

As some of you may know, I've been selling some of my harvest and crafts at the local farmers market.  With that I've been also selling air plants and keep getting the question, well how do I care for them and what do I do with them? Well I've got the answers for you!!


First off let me tell you a little about air plants, or tillandsia, the scientific name for them. Tillandsia are part of the bromeliad family and do not need soil to grow. They are native to some of the southern states, central and South America and use their roots only to hold onto the trees, shrubs and rocks that they live on.  They get all of their water and nutrient requirements through their specialized leaves.

They are a tropical plant and there for like warm humid environments with temperatures no lower than 45 degrees Fahrenheit. Air plants do best in bright indirect sunlight and will get sunburned when left exposed too long.


I have some hanging air plant terrariums in the window over my kitchen sink, which is north facing and they do very well there because they still get a lot of indirect sun light and there's more moisture in the air from cooking and doing dishes. If you're the forgetful plant caretaker a situation like that is best. 


Tillandsia do best when soaked in water for 15-30 minutes once to twice a week depending on humidity levels and a misting a day when it's dry. A low nitrogen fertilizer mixed weakly can be used once a month to encourage new growth. 


After soaking them shake off excess water and set out to dry for a bit before putting them back into their globe or any where else that would restrict air flow.
 

We sell the Tillandsia in hanging terrariums, and sea urchins, or on their own. It is best that how ever you choose to show case them, that they have good air circulation and that water doesn't pool under them, as to mimic their natural environment. 

With all the different species of tillandsia, 650 of them to be exact, you'll surely have an architecturally pleasing show piece to add to your home design.  


Enjoy these very interesting little creatures and be creative with how you use them. I hope this gave you a better idea of how to care of your tillandsia. 
Best. 

~ Megan~

Wednesday, May 27, 2015

Life on the homestead


Things are really starting to come together around here. The weather is finally warm enough to plant the gardens without danger of frost. I pushed it a few times with my flower barrels and the potato vines got a little frost bit but they're coming back nicely. The new flower garden I put in around the weeping cherry tree my mom got me for Mother's Day is all planted, I just have to get out there and sheet mulch it. 


The lower veggie garden got an expansion, thanks to my uncle Dale for coming down and tilling up more of the lawn, or what we call a lawn, into more garden space. I think I'll need all the extra space I can get. My veggie starts weren't the biggest hit at the markets so I may as well plant them and get something out of them. 


Once the weather cools down a bit I'm going to get out there and add compost to the new beds and mulch the walkways and put the rest of the plants and seeds in.  I finished planting my raised beds the other day and have been chipping away at mulching them too. 

I can't wait to see and try some of the new stuff I planted.  I planted some sun berries, goose berries and ground cherries all of which are in the nightshade family that I have yet to try. Hopefully they are a hit cause I planted a ton of them. 


My peony bushes have about 50 buds ready to start blossoming. For anyone who knows me they know that this is very exciting for me, peonies are my absolute favorite flower. Not only are the absolutely gorgeous but they smell heavenly! 


I love to cut them and make arrangements for all over the house and especially next to my bed so that I can take a big wiff of them before I go to bed at night and first thing in the morning, there's no way you can have a bad day after waking up to that. 


My little peanut has been so good the past few days doing things on her own so that mommy can get things done. If this hadn't occurred nothing, I mean nothing could get done. She's finally gone from wanting to be held even while sleeping to actually being stoked to go in her swing for a long nap. She's so cute you turn on her tunes and give her her blanky and she gives you a huge smile and just chills out and takes a snooze. I can't wait to start feeding her the food from the garden and see what she likes and doesn't. She's really starting to get big and show some personality, it's pretty neat this whole being a mom thing. 

All in all things are pretty good and starting to pick up around here. Excited for what summer brings and hopefully it will bring a few more customers to the market too, along with beautiful flowers, scrumptious fruits and veggies, and a growing happy girl. 

~ Megan ~

Thursday, May 14, 2015

First Farmers Market of the Season

Yesterday was our first Farmers Market of the season. I've been getting ready for it for weeks now, tending to my plant starts and buying all the gear needed for selling, like a tent, tables, cash box and receipts. It hasn't been easy with a newborn or the many set backs that I've endured, like my cold weather starts all getting knocked over or the chicken pecking at what was left and the one and only time we set up our tent it got broken pieces from the wind, but the time finally came and I was somewhat ready for it.


After forgetting to bring chairs and to get change for the cash box we made due and I had to run to the bank while my mom watched Mila. We set up the broken tent with help of our neighboring vendor and pulled my moms truck up and used the tailgate as seating. 


It was a slow day and not sure it was worth the headache really but we had a good time and I had a few friends stop in and chat is up so my only making the market fee of $5 in sales wasn't so bad. I'm hoping that the coming weeks will be better once there is actual produce to sell and people know the markets have started. 


Here's to hoping today's market will be more profitable. A new town and a new outlook 

Friday, April 17, 2015

Spring has sprung

Warm weather has finally come and the snow is receding. The spring bulbs are coming up and the chickens are in heaven searching for bugs around the yard. And I have been one busy bee cleaning up the gardens that never got finished last fall, starting seeds and planting early crops. 

I'll tell you it is a whole lot easier to do garden work without having to carry an extra 10 pounds of baby while doing it. Not sure little miss really has an appreciation yet for growing things but soon enough she will whether she wants to or not. 

I'm still trying to figure out how to get as much as I used to get done, although I'm not so sure I ever will. Things take twice as long but at least they get done and I'll tell you, you tend to really get upset when all that hard work gets ruined because it takes you twice as long as a normal person without a baby and you really have like zero free time to re-do it. So when the wind knocks over your little greenhouse stand with all your cold weather starts it feels even more devastating that you lost half your starts than it would normally. 

I'm hoping to still have some plants to sell at local farmers markets, even though the wind tried to ruin my parade, and I'm hoping my little girl will pursuade buyers to buy our goods over others just because they want to see my beautiful little sweetie. 

Only a few more weeks till the markets start and I feel like I'm moving at a snails pace in getting it all done but I have to remind myself to just be proud of the progress I've made, I mean it is hard to do it all with a newborn and I've gotten a lot accomplished. 

Everyday I try and get one more task out there finished along with the endless loads of laundry and housework that also needs tending to. But every once and a while  you just need a day to rest and lounge around on the couch and you especially need them when your little one thinks its party time at 3 in the morning and you get all of 4 broken hours of sleep. 

Even with things taking far longer to get done, I am so happy for spring and warmer weather. Just getting outside puts a whole new prospective on things and sharing them with my little peanut is so awesome. She's in awe by all the new sights and sounds. I love watching her experience it all. It's a real trip but I wouldn't change a minute of it and before I know it she'll be out there helping me. 

So for now I've got to try and be realistic about how much I can do and not go crazy at the local nusery buying tons of plants, like I normally do. I've had to reel myself in a few times already and learn to ask for help when I wasn't able to contain myself, not an easy task for me. 

There is definitely a learning curve to having a new baby and doing the things you do normally and we're still working on it. But spring has sprung and we're making the best of it and enjoying every minute. 

Sunday, March 15, 2015

5 Things to do During the Winter to Ease your Gardening Blues

1. Take inventory-  go through last years seeds and take an inventory, see what you've got and what needs to be ordered. I make a list of the seeds I have and how many are left so I know what needs to get ordered and also so I know what needs to get planted first before any new seeds.


2.  Order seeds-  one of my favorite things to do is go through the all of the gorgeous seed catalogs with a sharpie and circle all of the seeds I want to try out. I always go over board and more than half of the 6 catalogs have been circled and then I've got to go back and narrow it down some and still way over order, there could be worse things I suppose. 

3.  Organize seeds-  This was one project that my OCD was craving for quite some time now. For the past few years my seed packets have been unceremoniously been jammed into the paper bag in which I purchased them from and stored that way, making it very hard to see what I had for seeds and how much was left. Not to mention it definitely is not the best way to store seeds leaving them open to the elements.  So I've decided to organize and label them in a sealed Tupperware container to make them less susceptible to the surrounding atmosphere. I also color coded them to the time they need to be started and planted and organized them alphabetically and by type, veggie, fruit, or flower. Now my mind is at ease knowing exactly what I have for seeds and where they are and how much I have of them and when they need to be started and planted, it's pretty great.

4.  Create a garden plan-  This one is actually not my fortes. Every year I make one by the time it actually comes to planting it all goes out the window. The one thing that I have stuck to however is the planning of my raised beds and the placement of my garden beds, the placement of plants is a different story. I always inter-plant differing species and find the by the time everything is to its true size that I've planted things far to close to one another. So this year I'm going to actively try and plan out my spacing better and figure out some more companion planting to help minimize pest issues. We're also adding some more beds and getting a new fence so putting it on paper will be helpful to see the whole picture. You can do this the old fashioned way like I usually do on paper or there are some pretty cool garden planing apps for your phone or tablet out there now that you can always check out too.

5.  Start seeds-  Starting your own seeds indoors is a great way to ease those gardening blues and help you save money. Buying plants that have been starting can add up real fast and let's face it there really isn't much variety usually out there for them either. When you start your own you choose what varieties to plant and you know exactly where they came from and what was used when starting them. Plus you get to put your hands in the dirt and have the joy of watching them grow. Starting them indoors without a greenhouse can be somewhat of a challenge and can leave your starts off to a bad start because without proper light they can become spindly and can die due to dampening off. So having adequate lighting, humidity levels, air circulation, and not over watering are key to healthy plant starts but are a small price to pay.

Hope this gets you through till spring!!


~Megan~

Monday, March 2, 2015

Motherhood

The wait is finally over, after what seemed like an eternity, we finally got to meet our little girl a whole week early even. As I anticipated she came during a big snow storm along with 7 other girls that night. It's been a crazy mix of emotions and let me tell you motherhood is all consuming, filled with sleepless nights, and complete physical and mental exhaustion but like everyone tells you it's totally worth it, hours and days just fly past gazing at her endless amount of expressions and listening to all squeaks and groans she makes, I just can't get enough. Even in the godless hours of the night when my little angel turns into a nocturnal terrorist I still am so in love that even that doesn't get me regretting my decision to have her, well one or two really awful nights I may have questioned it but when the angel came back the next day I forgot all about it.

When I say it's consuming I mean it in every sense. I thought that I'd be able to do all of these things while she slept and that my life wouldn't change that much but I was wrong. My life is completely different and I honestly never thought I could care so much for someone else but I do. Those first few weeks you're so exhausted that even the thought of cooking dinner or cleaning wipes you out and if she's sleeping you better try to too or you'll regret it at 2 am while your little girl is screaming bloody murder and you've only had 4 hours of broken sleep to keep you going. 

You then start to wonder how you'll ever get your taxes done, or when you'll feel like writing a blog post, or even baking yourself something yummy. Slowly I'm starting to get used to the complete lack of sleep and am able to cook a nice meal or even go out for one. These moments are so fleeting and sometimes I'm grateful of that but they really are something to be treasured as well and I couldn't be happier to be able to experience them for myself, we are truly blessed despite all the poopie diapers and sleepless nights. Welcome little miss Mila, mommy and daddy love you to the moon and back.


~Megan~


Friday, February 6, 2015

Gluten Free Chocolate Cake With Strawberry Frosting

So it's my partners big 30th birthday tomorrow and of course I just had to bake him a cake for the special occasion, after all turning thirty and having a baby due any day now is a big deal. So when I asked him what kind of cake he would like me to make him he said chocolate strawberry cake, kind of an unusual request I thought but I can make it work. Strawberries at the grocery store in February aren't very appealing, so thankfully I had just enough left in the freezer that I got at the farm stand this summer, so I could make the frosting strawberry as requested. The rest was pretty easy whip up and I'm sure it will make the birthday boy, or man, very happy! Here's how I did it:


Ingredients for the chocolate cake: 

- 2 cup organic sugar
- 1 3/4 cup of gluten free King Arthur multi purpose flour mix
- 3/4 cup cocoa powder
- 1 teaspoon salt 
- 1 teaspoon xanthan gum
- 1 teaspoon baking powder 
- 1 teaspoon baking soda
- 2 organic free range eggs
- 1 cup milk 
- 1/2 cup organic canola oil
- 2 teaspoons of vanilla extract
- 1 cup boiling water 

Instructions: 

Preheat oven to 350 and grease 2 9 inch cake pans. Add sugar, flour, cocoa, salt, xanthan gum, baking powder and soda to mixing bowl and mix together. Then add the eggs, milk, oil, and vanilla extract and mix with the dry ingredients. Then add boiling water and beat until well combined, mixture will be thin. Add batter evenly to both cake pans and bake 30-35 minutes until toothpick comes out clean. Let cool completely before frosting. 

Strawberry frosting ingredients:

- 1 cup of organic strawberries
- 2 sticks of butter, softened
- 3 1-2 cup of organic powdered sugar
- 1 teaspoon vanilla extract

Instructions: 

Purée the cup of strawberries in a blender and add it to a sauce pan. Reduce the strawberry purée by half over medium- low heat, it should take about 20 minutes or so. Allow it to cool completely. 

In a stand mixer, beat butter till fluffy and then add a cup of the powdered sugar and beat some more.  Once combined add 2 teaspoons of the purée and the vanilla extract and mix well. Then add 1/2 a cup of powdered sugar to 2 teaspoons of purée at a time until all ingredients are added and well combined. Now use frosting to frost the cake and enjoy a big hunk for all of your efforts!! :)


~Megan~

Immune Boosting Tropical Smoothie

This is one of my favorite smoothie recipes. It's bright and citrus-y and packs a good punch to fight off any invaders of your immune system. It's chuck full of lots of vitamins and minerals and with the addition of coconut oil is also antibacterial and antiviral. The chia seeds add a good amount of protein and the coconut water adds electrolytes to keep you hydrated and its just plain good,  so what's not to love? 


Here's how to make it:

Ingredients: 

- 2 organic bananas 
- 4-5 organic oranges, segmented 
- 3 organic carrots, peeled and cut into chunks
- 1/2 cup or so of frozen organic mango
- 1-1 1/2 cups of frozen pineapple 
- A heaping tablespoon of organic extra virgin coconut oil
- 1-2 tablespoons of chia seeds
- 1/2-1 cup coconut water 
- 4-5 ice cubes 
 
Instructions: 

Add all the ingredients into a high powered blender and blend away until nice and smooth. Poor into your favorite glass and enjoy!! 

~Megan~

Monday, February 2, 2015

5 Tips to Keep your Houseplants Happy and Healthy During Winter

If you are anything like me when winter is at its peak, your looking for ways to get your hands dirty and have some greenery around.  Houseplants are a great way to fill the gardening void but can sometimes prove to be a challenge at keeping happy and healthy during the long cold winter months.  The air is drier, there's less light, and some houseplants can just be miserable and even die  because of it.  If your house is anything like ours and heated with wood heat is can be a challenge getting the right temperatures and humidity levels that a lot of houseplants thrive on and also poses some other challenges as well.  Here are a few tips I've learned over the years to help keep those houseplants, and you, happy and healthy throughout the winter.


1.  Make sure there's an adequate humidity level-  The dry air in winter can really cause havoc to a lot of your houseplants.  Most tropical plants need the humidity levels to be around 70% and the majority of the houseplants are of the tropical variety, with the exception of succulents and cacti which do just fine in dry climates.  You can add moisture through the air by running humidifiers, simmering water on your wood stove, and by making sure that it doesn't get too hot in your home by trying to regulate your heat source, which is not the easiest thing to do with wood heat but worth an attempt. Also letting your house get a few degrees cooler at night will really benefit your houseplants as well when transpiration rates would naturally slowdown.

2.  Increase watering-  With winter drying everything out and the artificial heat, it is really important to keep an eye on the soil moisture level of your houseplants as well.  I tend to increase my watering of my tropical houseplants from once a week in the summer months to twice a week during the winter.  When temperatures are high and there is low humidity plants transpire at a much higher rate and therefor the require much more water to continue to stay healthy in that environment. Just go around and stick your finger in the soil to see weather or not they need an extra drink, if it still feels moist skip it.

3.  Dust your Houseplants-  Wood heat, along with other heat sources, can really cause an abundance of dust floating around and it tends to accumulate on the leaves of your houseplants essentially strangling them.  Plants breath through the stomata in their leaves and stems and when a thick layer of dust is blocking them from opening and making gas and moisture transfers the plants really begin to suffer.  Houseplants aren't exposed to rain like they are in nature to remove the buildup so it is our job to keep them clean.  I really like being hands on with my plants so I usually will wet down a rag with water and hand wipe the leaves and steams to clean off the dust, dirt and cobweb buildup, but you could easily put them in your sink or shower and spray them down as well. Although something seems so impersonal about it and you can't guaranty that you've gotten it all off that way either, just my opinion, many people use this method to save time and energy. I suggest doing this at least twice a year if not more.

4.  Spray down houseplants to remove salt build up-  hosing out the soil near the end of winter is also a great thing to do to keep your houseplants in optimal health.  Many of us have treated water in one sense or another, like water softeners, or chlorine treated tap water and the salts from these treatments tend to build up in the soil over time causing toxicity, so it is imperative to really hose out any of the buildup in the soil.  In the summer months I water our house plants with collected rain water from our rain barrels but have to water the houseplants with our treated well water in the winter, so usually sometime in March I take our 30 something houseplants into the shower one by one and give them a thorough soaking and let them sit in there to drain before putting them back to their respected homes.  Sometimes I even wait till spring to do this so that I can use the rain water but really as long as you're really rinsing out the buildup it shouldn't make a difference. If you always use treated water on your houseplants you may want to consider doing this twice a year.

5.  Add lighting if needed-  The shorter days of winter can make some of your more high light house plants unhappy and they may benefit from some artificial lighting to supplement, especially in the really dark months of winter.  I know the houseplants that we have on our balcony by our staircase just doesn't get as much sunlight as in the summer months and our plants tend to suffer there because of it, so we have gotten a couple plant lights to shine on them during those times.  Or if you know that about a certain spot you may want to consider moving higher light plants closer to a window during the winter months or choose plants that can handle low light locations for those spots that get darker in the winter months.


There you have it, with these few tips you should have all the tools you need to keep your houseplants happy, healthy and radiant even in the long months of winter, while also curing your gardening itch until spring comes around.  If you have any comments or tips to add feel free to add them, we'd all appreciate it. Thanks!


~Megan~


Sunday, February 1, 2015

DIY Nusery Art Projects

It was really important to me to have a creative and unique space for my baby girl to call home, so for me that meant making it my own, myself.  I'm a big advocate of skipping the big box stores in loo of doing it yourself.  I understand that not everyone is super crafty or has the time to make things themselves.  I get it, modern day life is chaotic, but honestly these projects don't really require a ton of time to invest into them and are really easy to make, plus you can customize it to your own personality and it's a pretty inexpensive way to decorate your nursery.  I know I posted the DIY butterfly mobile tutorial the other day but here are a few more DIY projects for you to try out.


There you can see the mobile that I posted the other day and the embroidery hoop art that I did as well.  Both are pretty easy to make and customize you can use any color fabric, paper, paint, and shapes.  Here is another DIY project that I did for the nusery too.


What better way to teach your little one the alphabet than putting it up on their wall?  For this project I went to my local craft supply store and got letters in all different sizes and from different collections of alphabet styles to create a uniquely shaped alphabet. Then I painted, modge podged scrapbook paper and glued beads and glitter to the letters making everyone different.  I painted the Z in zebra stripes, the G in gold glitter, the Y yellow and painted the P purple and put polka dots on  it to go with the theme.  Not all of them fit the B is for blue or V is for violet but a lot of them do.  I think that this is a great way to decorate a nursery wall that is not only totally cute and customize-able but also educational as well.


Here's another way to jazz up your nursery or any wall in your home really.  Get some cute printed fabrics and some cheap embroidery hoops and BAM you've got some custom wall art!  By far this was the easiest of all the projects and took the least amount of time to make, and I'm even thinking of adding a few more smaller ones too.  Ok so here's how you do it and what you need:


Supplies for Embroidery Hoop Art:
  • Printed fabric of your choice
  • Embroidery hoops of varying sizes
  • Good fabric scissors
  • Hot glue gun
 This could not be easier, choose your fabric and hoop size and cut out fabric to fit the hoop, like so:


Then you could iron the fabric but honestly there's no need to because the fabric is going to be pulled really tight in the hoop eliminating any wrinkles and I really never iron anything, ever, so why add another step.  Center the fabric to the top of the hoop where it will end up being hung from and add the outer hoop and tighten so that the fabric is nice and taught.


Next trim off excess fabric and cut slits every inch or so around the hoop to reduce bulk when hot gluing.  Then just hot glue the left over fabric to the back of the hoop all the way around to create a seamless look.


And that's all there is to it!  So simple yet so cute and they literally took tops 10 minutes to make.  You just follow the same steps for them all using differing fabric and once they're all done hung 'em up with a small nail right where the hoop comes together.  If you want you could also paint the wooden hoops different colors or buy the plastic ones that are already different colors or just leave them as is like I did.  The beauty to these projects is that you can really make them your own and totally personalize your space.  Well hope you enjoyed these fun and easy projects. Take care!


~Megan~